 |
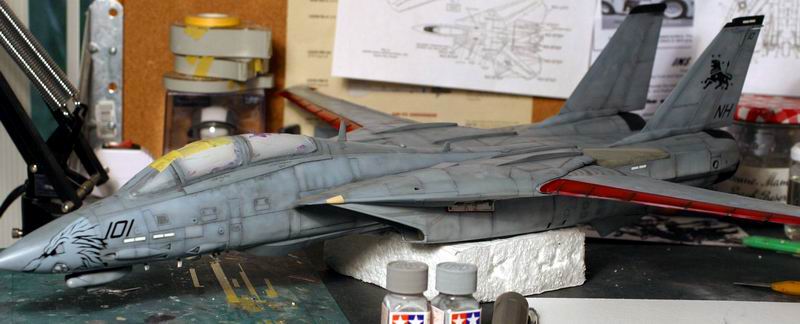
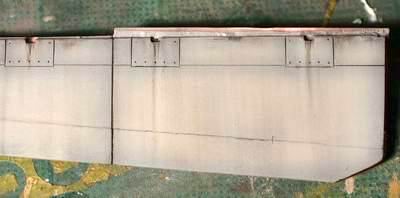
基本塗装が終了したので、ウォッシングに入る。エナメルの黒1に対し、エナメルシンナー10程度を混ぜたうすい黒をパネルラインや、汚れのあるべきところに筆で塗りつけていく。 After competition of basic painting, start weathering. Apply wash. Make thin black enamel at ratio of 1:10. Paint it to panel lines and dirty marks. |
 |
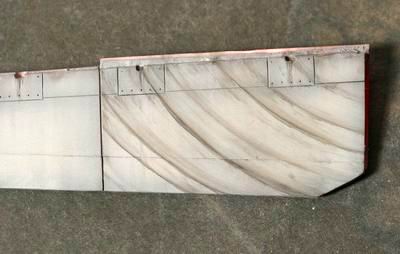
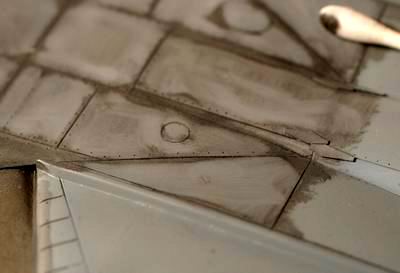
少し乾いたら、綿棒にエナメルシンナーを浸して、余分なエナメルを拭い取っていく。雨垢や、オイル汚れなどを模して少し残すのがコツ。 After a little bit of drying, remove excess enamel by rubbing cotton swab with enamel thinner. Leave rain and oil marks as shown in this photo. |
 |
白い斑点は、基本塗装の時に、パネルラインだけではなく、このような汚れがあるところに濃い色を丸く吹き付け、最後に明るい灰色で真中だけ吹き付けるとこのような汚れが作れる。 As for white round dirty mark, in base painting, I sprayed dark gray circle and then spray bright base gray inside that circle. |
 |
オイル汚れは綿棒で拭い取るときにうまく残したもの。失敗したら、またエナメル黒をのせて、綿棒で引っ張れば簡単にできる。 For oily marks, I put enamel black where the mark would start and then stretch it by sliding cotton swab with thinner to where it ends. |
 |
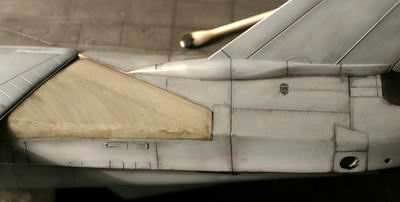
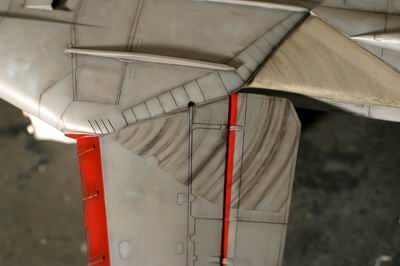
翼の開閉でできた回転マーク。実機の写真を見れば、このような汚れがあることがわかる。左側をマスキングして、綿棒に先ほどの薄めた黒を浸して、ハンドライティングした。やり直しは面倒なので、慎重に書こう。 These are wing rotation marks. Mask other side, and draw it by hand with cotton swab dipped in thinned enamel black at ratio 1:5. It's hard to re-draw, so concentrate. |
 |
本体のこすれる側の布地にも、同様なマークが残っている。 Draw slight marks on the inflatable "bags". |
 |
ウォッシングのおさらい。まずは薄めたエナメル黒を筆で塗る。エナメルシンナーを浸した綿棒で、、、 Review WASH technique. Paint thinned black enamel. Dip cotton swab into enamel thinner. |
 |
パネルの内側を拭い取る。一回だけでは、まだ汚い。 Remove excess enamel mainly inside panel at first. |
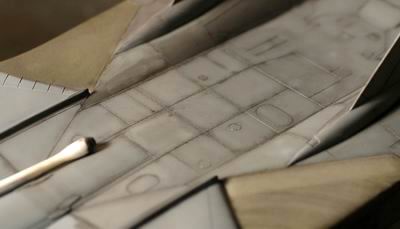 |
新しい綿棒でもう一度、内側を拭い取る。 Throw used cotton swab away. Clean with new cotton swab again. |
 |
さらに新しい綿棒で拭い取る。3回も行えば、きれいな汚しとなる。 With new cotton swab, clean it again. You need at least three cotton swabs to complete. |
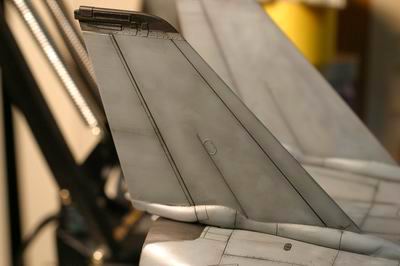 |
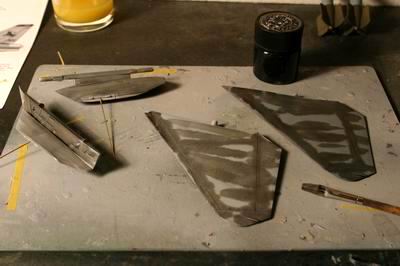
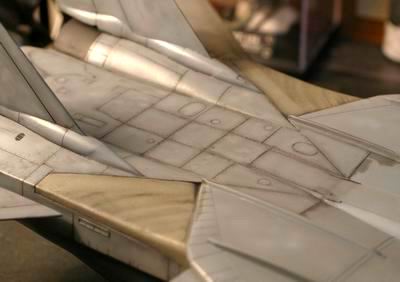
垂直尾翼も同様に行う。汚れの付き方は実機の写真を見て研究してください。 Study actual aircraft to see real dirt pattern. I downloaded many photographs from the Internet. |
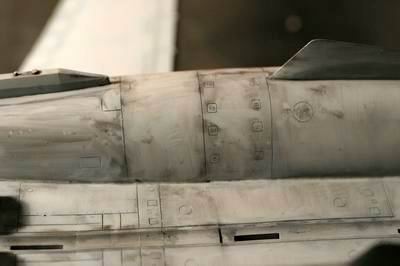 |
これは1回目のふき取りが終わった段階。あと2回はふき取る必要あり。 This is the condition just after the first removal of black enamel. You need to clean twice more. |
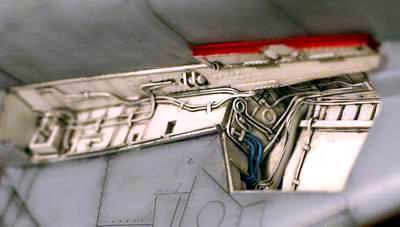 |
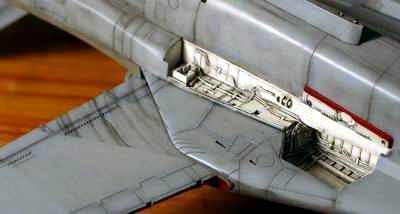
車輪格納庫も同様な方法でウォッシングする。その後、青や灰色、黒などで配線を塗り分ける。渦巻きがよくわかる。 Apply wash inside the bay as well. Wash is very effective to accent such places. After the wash, paint wiring with enamel blue and gray. |
 |
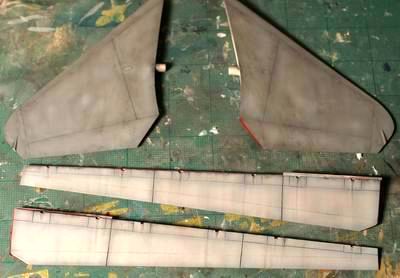
翼の回転マークは上下にある。 There are rotation marks on both top and bottom. Here's side of wing. |
 |
右半分のウォッシングが完了。消費する綿棒の数は半端ではない! Right hand side is completely washed. There are so many cotton swabs required for such a big aircraft. |
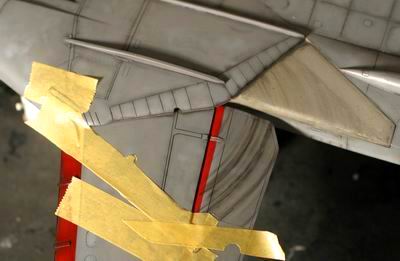 |
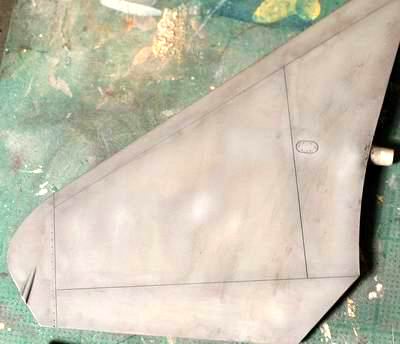
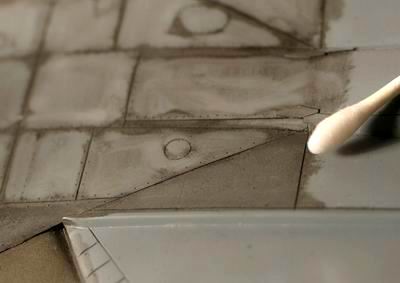
回転マークのおさらい。マスキングに丸いへこみ印を忘れないように。 For rotation marks, mask the shape of the glove. Don't forget the half circle shape. |
 |
フラップとの回転角に気をつけよう。 Draw marks continuing to the flap. |