 |
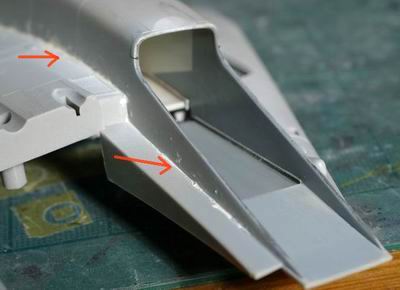
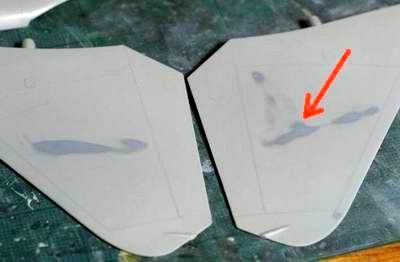
写真の赤の矢印の部分の隙間はパテで埋め修正。 I used putty in the area indicated by red arrows in the accompanying photo. |
 |
修正後。 This is what it looks like after sanding |
 |
わざわざ取り付けたレジン製センサーは、F-14Dには無いことがわかり、後ほど取り外すことになる。 I used putty on the other side, too. Two sensors are shown in this photo. But I discovered that they are not installed on F-14D. They will be removed later. |
 |
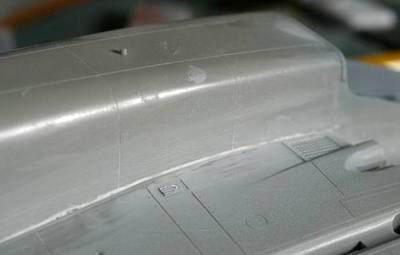
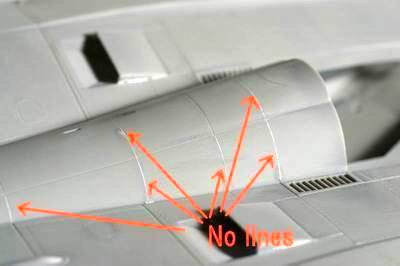
この部分は段差が激しく、修正のやりがいがある?!パテで埋めてかなりの削りこみが必要である。 There is a pretty big step here. It requires lots of putty and sanding to put it right! |
 |
150番で荒削りをする必要があった。かなり削ったため、パネルラインを堀直した。 I started out with No.150 sandpaper. I rarely ever use this grade of sandpaper. After sanding, I had to rescribe all panel lines in this area. |
 |
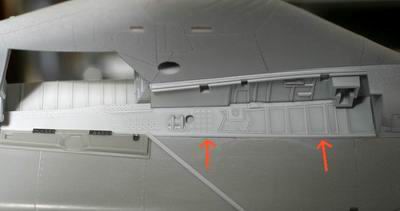
上面のパネルラインは実物とかなり違っているので、写真などを参考に消したり、彫りなおしたりする必要がある。しかし上面のパネルラインの詳細がわかる写真はなかなかない。私は近所の博物館やミラマーエアーショーに行って、トムキャットの実物を見て研究した。赤の矢印の部分のラインは実物にはないので、削り取る。 There are many mistakes in the panel line positions on original kit I removed many lines and rescribed them referring to photographs. Sadly there are not so many photos showing the top side. Therefore I went to the Oakland museum and Miramar airshow to see actual aircraft. |
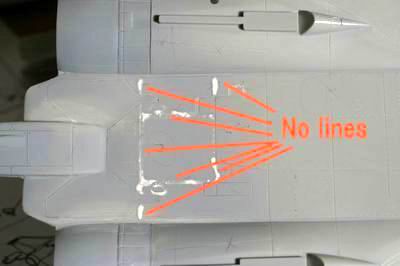 |
ここも消す。 There are no panel lines here on the real aircraft. They should be removed. |
 |
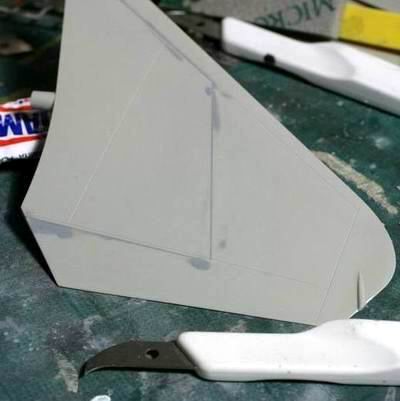
なぜこの部分が別パーツになっているか理解できないが、はめても反りがあるのでパテで修正する。 I don't understand why these parts are made separate. Also the joint is not flat. It requires some work with putty and sandpaper to produce a nice level flat finish. |
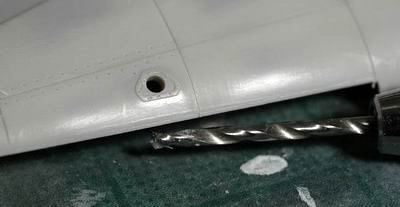 |
ライトは透明パーツで作り直す。この段階で穴をあけておく。 I replaced the light with a clear part. I used a pin vise to make the hole. |
 |
ナイフやフィラーで形を整える。 Then I reshaped it with a model knife and filler. |
 |
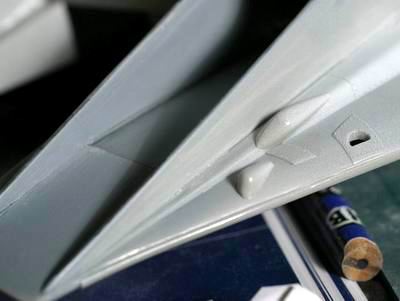
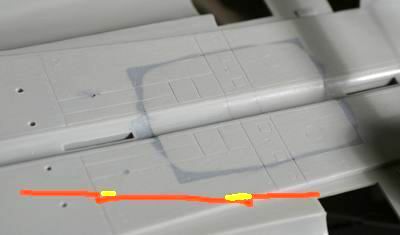
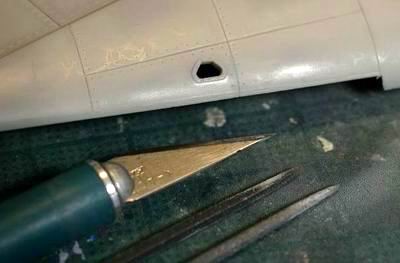
この部分も大きなギャップがある。パテで修正はできないので、角型プラ材をはめ込む。 there is big gap here by the arrows. I used Evergreen bar to fill the gap. |
 |
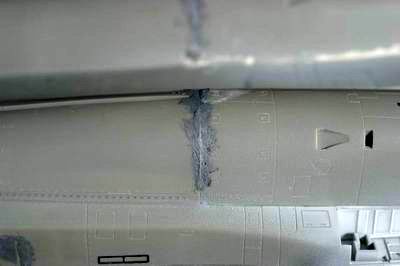
エルロンのつなぎ目をパテで消す。 I removed seams in the elevons with putty. |
 |
必要なパネルラインを追加。ハセガワのテンプレートはバーリンデンのものより薄くて使いやすい。 I scribed new panel lines with Hasegawa's template. It is better than Verlinden's, because it's so much thinner. |
 |
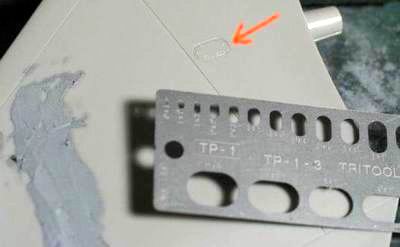
ひけを修正。 There are some dips in the plastic that need to be filled in with putty. |
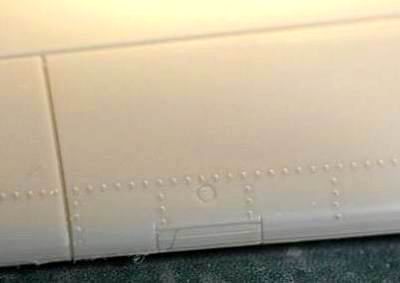 |
出っ張りリベットはやすりで削り取る。そのまま削ると跡がわからなくなるので、削る前に薄くサーフェサーを吹いておくと良い。 I sprayed gray primer before smoothing down the rivet marks. By doing so, you can see the position of scribed hole better. |
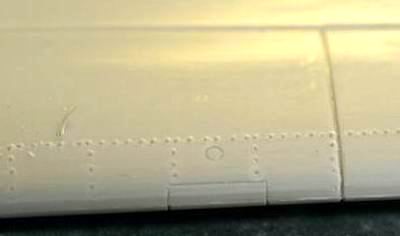 |
1000番程度のサンドペーパーで削ったあと。穴を開けるべき位置がよくわかる。 After sanding rased rivets with 1000 grade sandpaper, you can see where you should make holes.. |
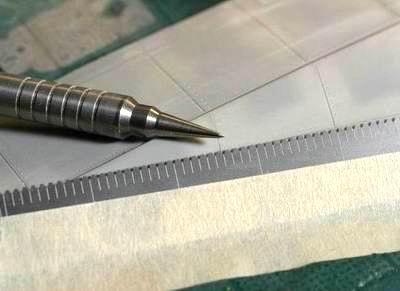 |
リベット打ちはハセガワのリベットセットを使う。 For the rivet marks, I used Hasegawa's rivet gauge and a scriber. |
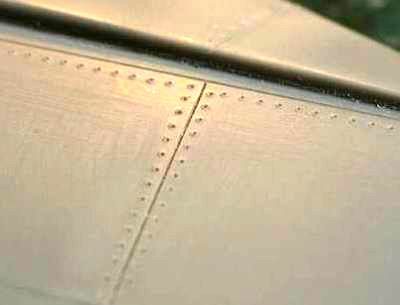 |
打った直後は穴のまわりが盛り上がるので次のように修正。 After scribing, there is rim around the hole. I cleaned them up as follows. |
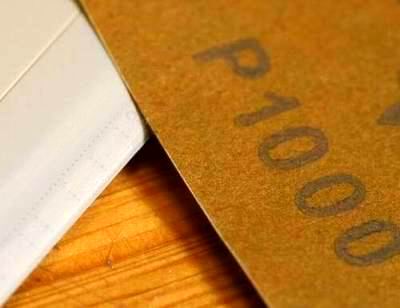 |
穴の反り返りを1000番のやすりで落とす。やすった跡は削り粉がつまるので、ダストスプレイで吹き飛ばす。エアーで取れないところは針で取り除く。 Lastly, I sand the rim off the rivet holes with 1000 grade sandpaper. I can remove powder from the hole by blowing the area with dust-spray. The power taht still won't come out can be removed with the tip of a needle. |