 |
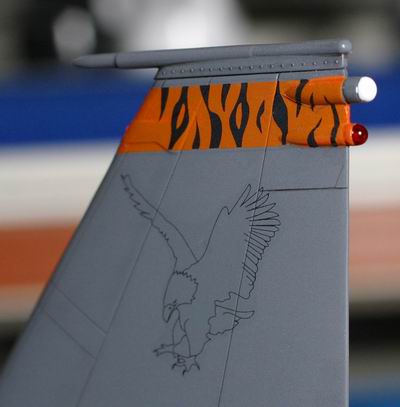
エナメルのクリアーレッドでスプレイしたパーツを流し込み型接着剤で固定。 Spray Tamiya's enamel clear red for lamps. To glue it, use Tamiya's Extra Thin Cement. |
 |
きれいに光る。 Nice reflection. |
 |
クリアーパーツのクリアースプレー塗装は薄く何回にも分けて塗装するのがコツ。5分は間隔を空けよう。 To finish painting nicely for clear parts, Spray several times with each small amount of paint. Interval should be over 5 minutes. |
 |
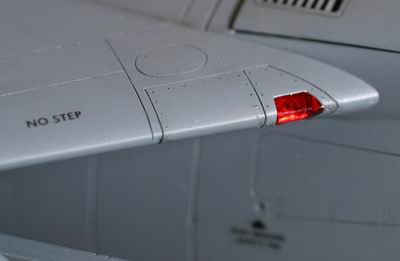
こんな感じ Looks good! |
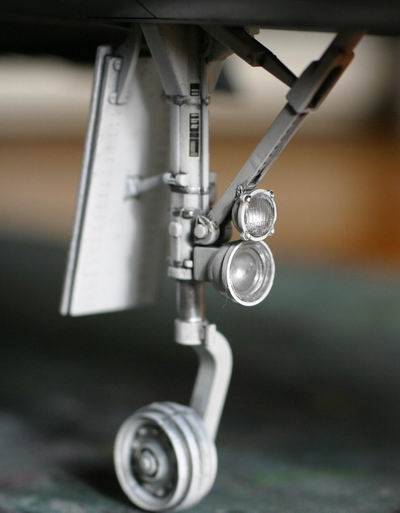 |
クリアーパーツははめ込んで、流し込みタイプの接着剤を流し込む。 Snap clear lens into lamp and pour Tamiya's Extra Thin Cement. |
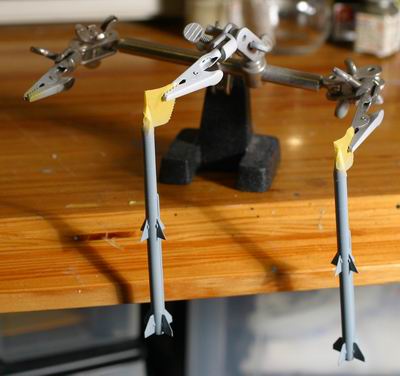 |
クリップに便利。 Very handy tool. |
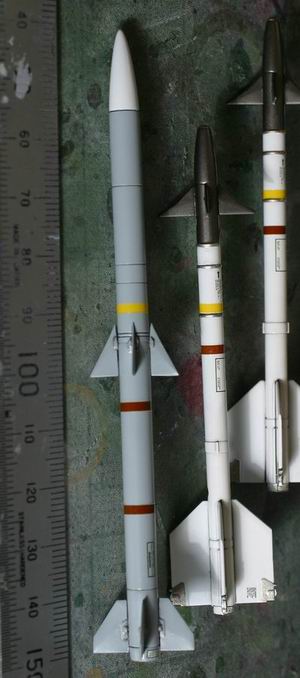 |
ピン跡にパテもり->パーティングラインをカッターを立てて消し->サンドかけ->筋彫りし直し->組み立て->白プライマ->マスキング->エアースプレー塗装->エナメル黒で墨入れウオッシング->ウオッシングをふき取り->デカール貼り(実弾は茶色と黄色帯、ハセガワ1/48ウエポンから拝借)->金属部分をエナメルで筆塗り->完成 Putty on pin mark -> Shave parting line with knife -> Sanding -> Restoew rased line -> Assemble -> White Primer -> Masking -> Spray paint -> Wash with enamel black -> Remove excess enamel -> Apply decals (Test missile wear blue stripes) -> Paint silver paint -> Finish |
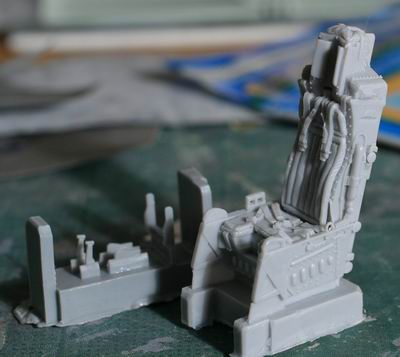 |
CEMのレジンシート CEM's nice resin ACE II seat. |
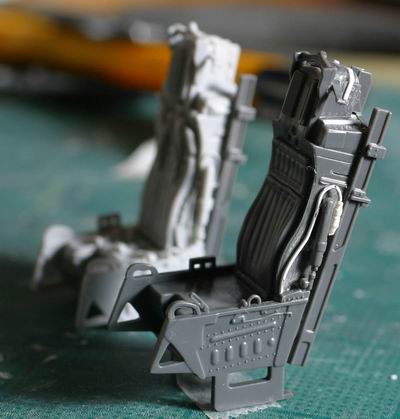 |
Day2で苦労して組み立てたバーリンデンのACEIIシートは横幅が広すぎて後部座席に入らないし、CEMとタミヤの形状と随分異なるので、結局、パイロットを座らせる後部座席はタミヤ製、前部CEMにすることにした。 Although it took many hours to assemble, Verlinden's seat (as shown in Day2 session) would not fit in back side of cockpit. It's too wide. I decided to use CEM's for front seat and Tamiya's for back seat with pilot. |
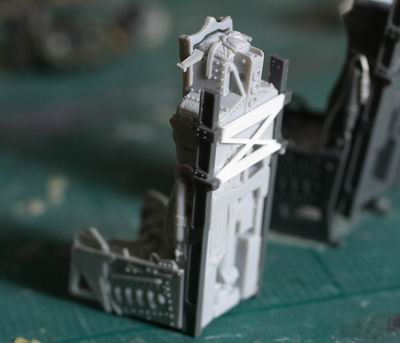 |
CEMレジンシートには後ろの固定バーがなく、タミヤのシートから切り出し、プラ材でディテールアップ。 There are no rails behind the resin seat. Cut off the rails from Tamiya's one and put them on with some Evergreen's. |
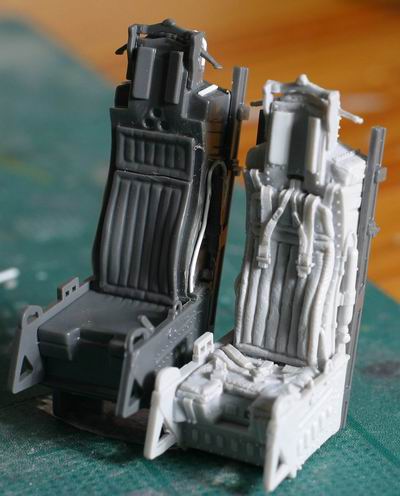 |
タミヤのシートにはバーリンデンのボンベなどのパーツを流用しディテールアップする。 Detail up Tamiya's seat with Verlinden's oxygen bottle, wires and Evergreen's strips. |
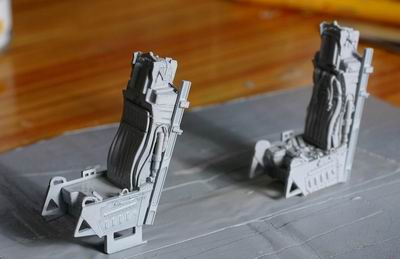 |
ほぼ同じ形状。よく見える前部座席はレジンのディテールが映える。 Tamiya's and CEM's look the same from distance. CEM has nice details for visible front cockpit. |