 |
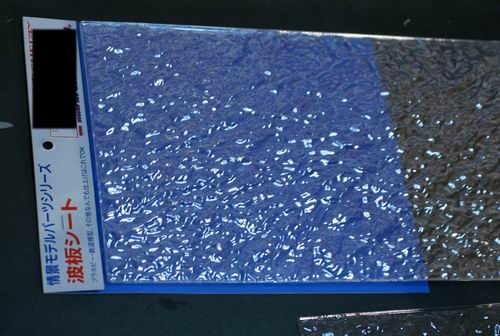
実は前ページとこのページの間に日本への出張が入り、大きな変更が起こった。新宿のイエローサブマリンを何気なく物色していたら、この波板シートを発見した。何かに使えるのではないかと、1枚だけ購入して帰国。波を自分で造形するのは技術が必要なので、この板を型として利用することにした。 Here is the secret! Between previous page and this page, I went to Japan for a business trip. This caused big change for the diorama. I found the Kawai's "Wave Formed Sheet" by chance when I was browsing the Yellow Submarine which is the most famous scale model shop in Japan. I thought that I could use this somehow, I brought one sheet with me to US. I decided to use this sheet as the mold of the waves, because I thought it was difficult to form the waves by hand. |
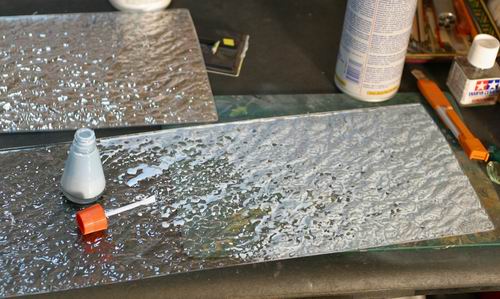 |
シートの上にジェルをのせ、1日待って、乾燥後はがすことにした。1枚目はシートに離型材がついていたと思われ、楽にジェルをはがせたが、2回目はジェルが食いつき、剥がせなくなってしまった。そこでメーカーに直接頼んでジオラマ全体をカバーするための6枚のシートを米国まで急送してもらうことにした。しかし剥がすのが不安であったため、マスキングゾルを水で薄めて、板に塗ることにした。ゾルも硬化後透明なブルーになるので、ジェルに混じっても大丈夫である。 Put the gel on the sheet and waited one day, I peeled off the gel from the sheet. First trial was successful but the color was not good. So I tried to make another one, this time I could not peel it from the sheet. There was some kind of oil on the sheet when the first one made. So I imported several sheets from Japan. This time, avoiding that mistake, I brushed water-thinned masking-sol on the sheet and then put the gel on it. Masking-sol also turns transparent blue. |
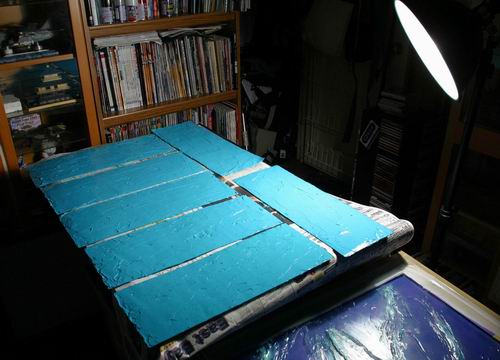 |
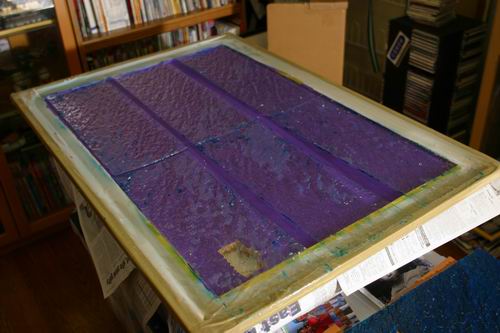
7枚の型取りを一気に行う。硬化を早めるには、ドライヤーであぶったり、写真用の照明で暖めたりするとよい。ちなみに波板シートは余分に多く購入したので、欲しい方はご連絡ください。
I made 7 thin skin gel at a time. In order to cut the dry time, I used photo light for warming. By the way, I got several dozen of the Wave Formed Sheet, so if you want some, please e-mail me. |
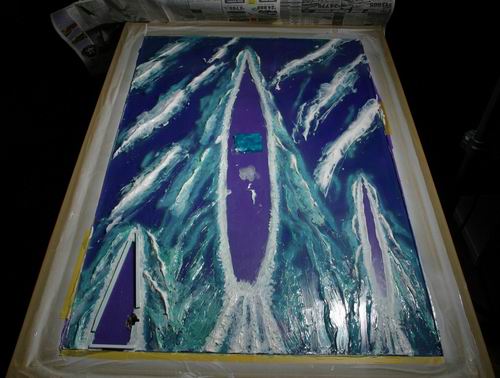 |
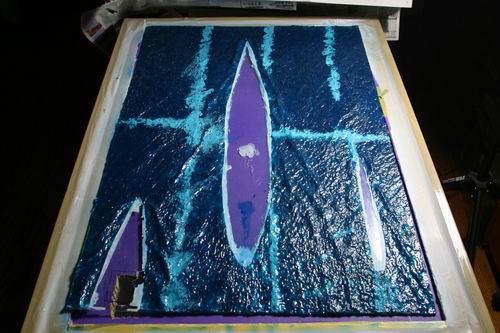
前ページで作った航跡のほか、波の大きなうねりも入れた。気をつけなければならないのは、波板シートの波の方向とこの大きなうねりが同じアングルでなければならない。 I put big waves along with the ship trail. Be careful the direction of the wave. It must be same way of the waves on the Wave Sheet. |
 |
型から取った波シートを貼っていく、接着剤はいらない。なぜならジェルは接着効果があり、押さえつけるだけでうまくなじんでいく。 Put the thin wave gel one by one. You do not need glue, because the gel itself has self-adhesive. |
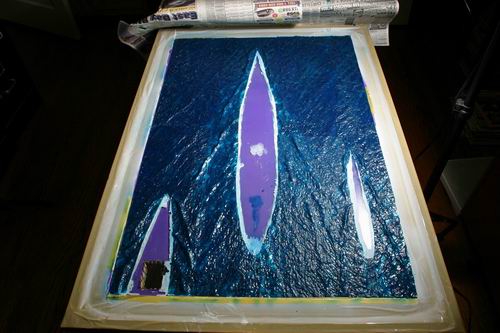 |
7枚のシートを貼った状態。 I used 7 thin skin wave gels to cover all. |
 |
継ぎ目は作り置きしたジェルをつめていく。 Put the gel in the seam of the gel sheet. |
 |
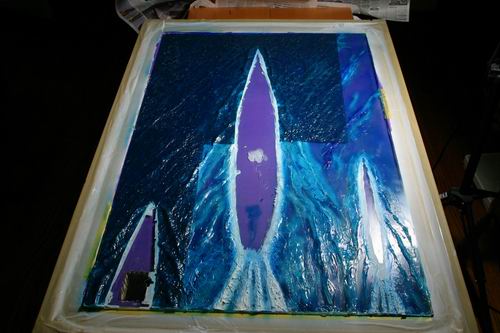
ご覧のように乾燥前のジェルと乾燥後のジェルの色はこれだけ違うが、硬化すれば同じ色になる。 As shown in this photo, the color of the gel dried before and after is much different. But don't worry, it turns same color eventually. |
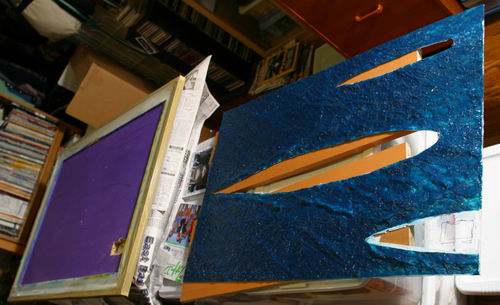 |
アクリル板上の海面を一旦取り外した状態。 Take off the Plexiglas. if you do not like the color match, now you can change the sea floor color. |
 |
ここで、捨てようと思っていた波板シートをアクリル板と海底の間に挿入することを偶然思いついた。これにより、海の深みが増長されることになった。 I just got a bright idea when I was throwing away the used Wave Formed Sheet. I put those between the sea floor and the Plexiglas. It effected the depth of the sea much better. |
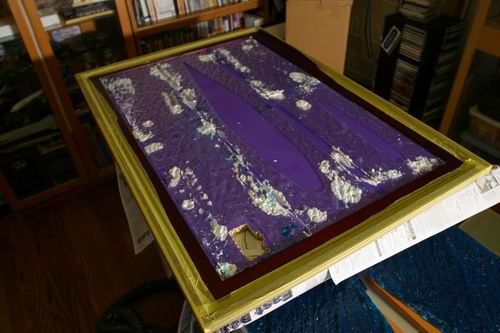 |
接着には木工用ボンドを使った。こちらも乾燥後に透明になる。 I used Elmmer's glue . This one also turns transparent when it's cured. |
 |
そして、白を適当に塗りつけることで、海の中の荒れを表現した。 I dry-brushed the sheet with white like this. It represents the ripples inside the sea. |