 |
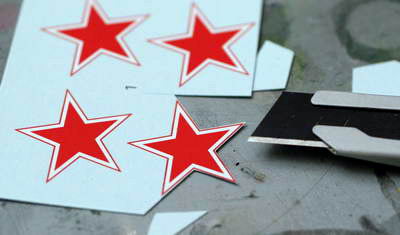
デカールは余白をなるべく切り取ってシルバリングを防ぐ。カッターは薄刃がお勧め。 Cut decal's margin as much as possible to avoid silvering. Thin blade cutter knife is handy. |
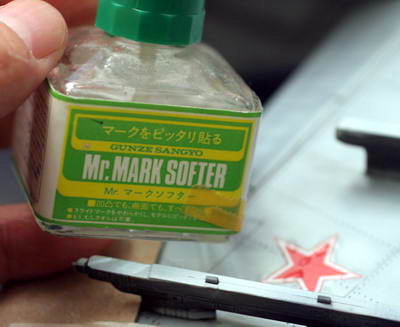 |
普通どおり水で貼った後、デカール軟化材で定着させる。液を上から塗った後、数分でデカールがしわくちゃになり始めるので、すかさず、綿棒を上から押さえつけて、液を取る。あまり放置するとデカールがぐちゃぐちゃになってしまうので注意。デカール内部に空気が残らないようにしっかり押さえつける。 I use Gunze's Mr. Mark Softer to set decals. This liquid melt decals, so timing of wiping is very crucial. Although it depends of size and thickness, decals may get wrinkly after about sevral minutes. Don't leave it longer than it. Also actually don't wipe it. It is very fragile now. I gently push a cotton swab vertically for removal of liquid. |
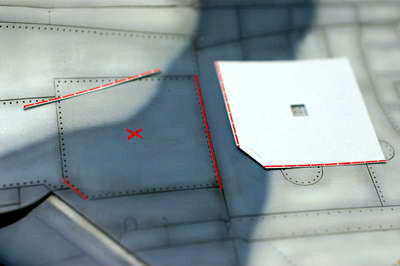 |
この赤点線は実際にはこんなに大きくなく、パネルラインよりかなり小さめの四角である。貼ってから写真を見て気がついた。 After set of these decals. I found out that actual red dot marks are much smaller than the panel lines. |
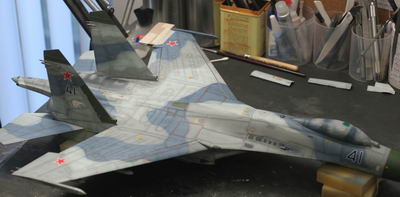 |
デカール完了。 All decals set. |
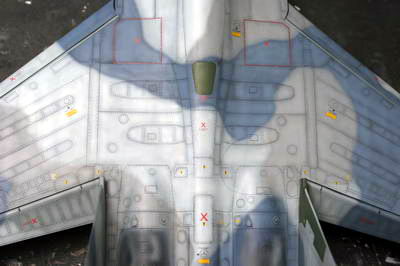 |
デカールはあまりに原色過ぎてちぐはぐである。5日くらいは乾燥させるために放置して、それから部分ウォッシュする。 Decals are so unrealistic. I will apply wash technique later again. But I have to wait at least 5 days. till decals get completely dried out. |
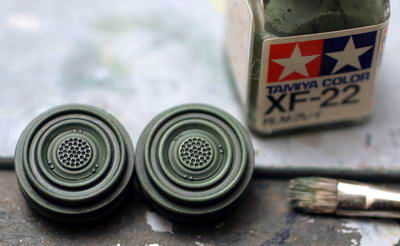 |
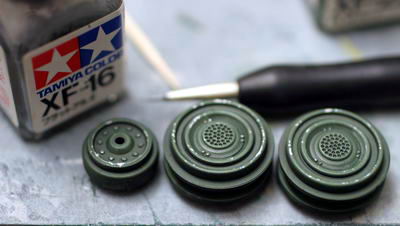
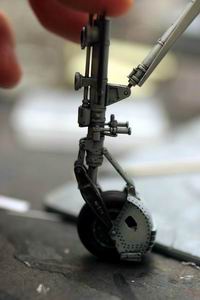
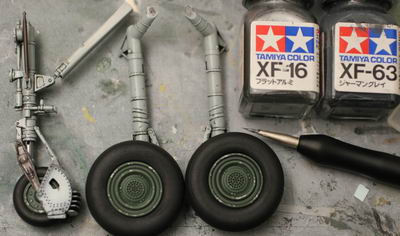
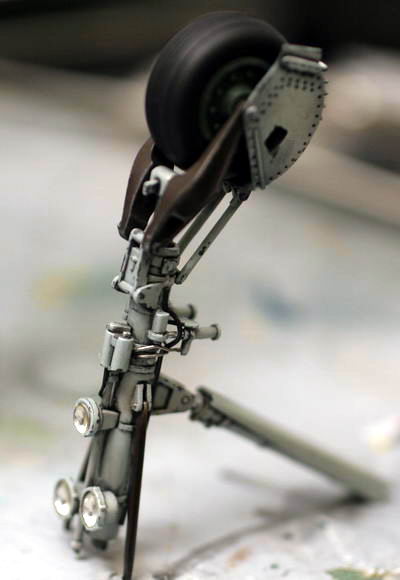
ホイールはRLMグレイでドライブラシする。ドライブラシの方法はタイガー1のStep10ページを参照してください。 Dry brush the wheels. With only a little bit of enamel paint on the tip of a dry brush, wipe it on a piece of paper until there is barely any paint remaining on the brush tip. The color I use here is RLM Gray. This becomes the highlighting color.Barely touching the part, stroke the brush repeatedly over it See Step10 page in the Tiger 1 how to article for reference. |
 |
チッピングはフラットアルミで書き込む。エナメルなので、失敗してもエナメルシンナーで拭き取れば何回でもチャレンジできる。 Put chip marks with Tamiya's enamel Flat Aluminum. If you don't like the pattern, you can just wipe them with enamel thinner and retry again and again. Enamel on the lacquer finish is very easily removed by enamel thinner. |
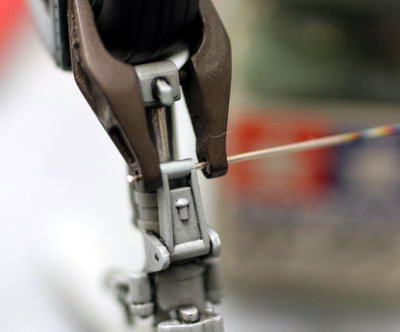 |
この部分のギミックはヒンジ側に穴をあけ、裁縫用のかたい針を軸にする。 Make a hole on the hinge and put steel bar into the hole. |
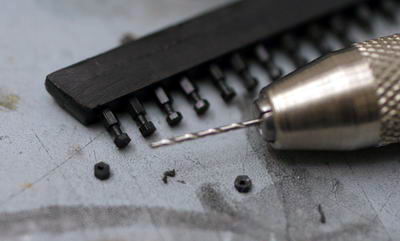 |
ナットは1/35AFV用のディテールアップパーツを流用。 I used nuts from 1/35 armor aftermarket parts. |
 |
メタル用瞬着で固定する。 Put small portion of instant glue on top of the nut. |
  |
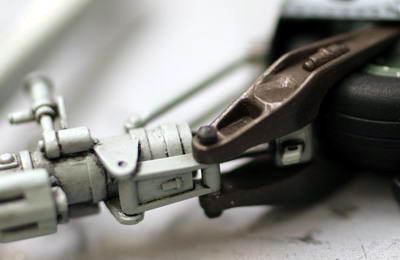
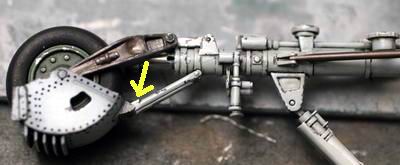
うまくできた。カバーをつなぐ細い棒も固定しないとはずれてしまう。2つ下の写真の黄色い矢印でしめしたように、小さなプラザ材ではさみこむ。 Here you go! I also put small plastics to fix the bar as indicated by yellow arrow in the photo after next photo. |
 |
支柱にフラットアルミやジャーマングレイでチッピングを施す。 Put chip marks with Tamiya's enamel German Gray and Flat Aluminum. |
 |
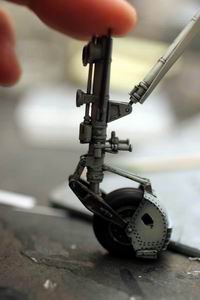
チッピングがよくわかる。 You can see how I put chip marks in this close up shot. |
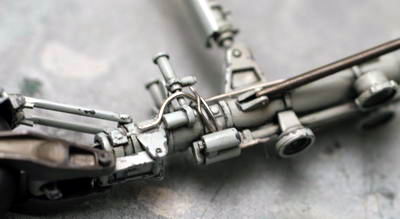 |
ハンダ線でワイヤリングし、 Put solder wire for wiring. |
 |
フラットブラックで塗装すれば完成。 Paint wires with enamel flat black. |
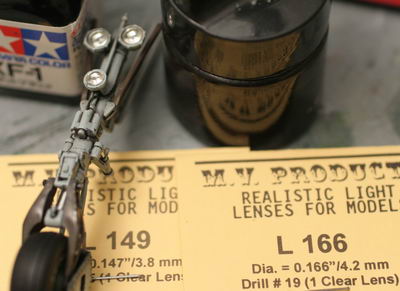 |
あとは鉄道模型用のきれいなレンズをはめ込む。直径4.2mmを2つ、3.8mmをひとつ使った。 Put MV lenses for the lights. I used two 4.2mm dia. and one 3.8mm diameter lens. |
 |
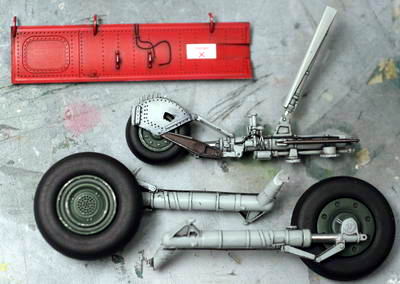
完成! Completed! |
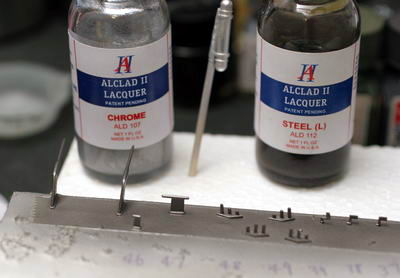 |
メタル塗装は歩くラッドノスチールとクロームを使用。 Air brush Alclad Steel and Chrome for metal parts. |
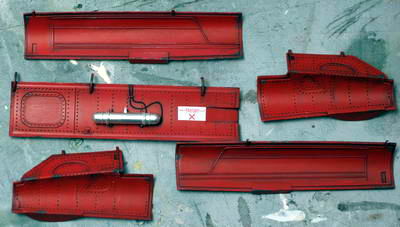 |
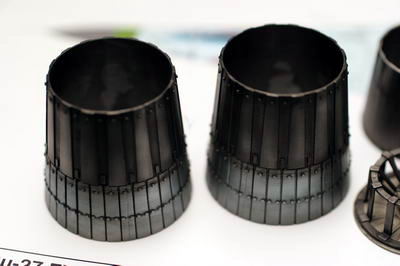
パネルの完成。ジャーマングレイでチッピングも入れた。 Completion of panels. I also put some chip marks with enamel German Gray. |
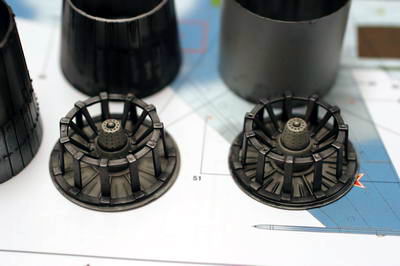 |
エンジンまわり。フィンとダクトの内壁はMr.カラーの45番セイルカラーをエアーブラシ。アルクラッドのジェットエギゾーストで汚れをエアーブラシし、エナメル黒でウォッシングして完成。ケージはジェットエギゾーストをエアーブラシしてから、102アルミをスポット塗装して、まだら塗装とした。 I air brushed Mr. Color No.45 Sail Color for blades and inside of the duct first. Then air brush Alclad Jet Exhaust for the exhaust mark. followed by wash by enamel black. Cages? are air brushed with Alclad Jet Exhaust first, and then washed by enamel black, and then air brush Alclad 102 aluminum little bit for the shining. |
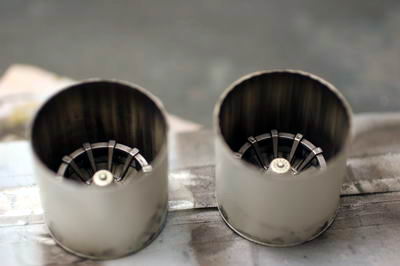 |
ダクト内。 Inside the duct. |
 |
次回説明予定。 to be explained later. |