 |
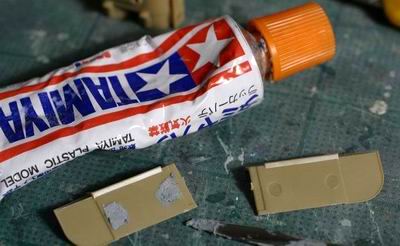
泥除けの裏側は注意すると見えてしまうので、ピン跡を消しておく。穴がへこんでいる場合はパテをのせて、やすりで均す。凸の場合は、やすりで削り落とす。 If you pay close attention to the back side of mud cover after completion, you can easily find the pin marks. Fill them with putty and level them flat if they form a dent, or just sand them off them if they are raised. |
 |
このように処理。 Make them invisible like this! |
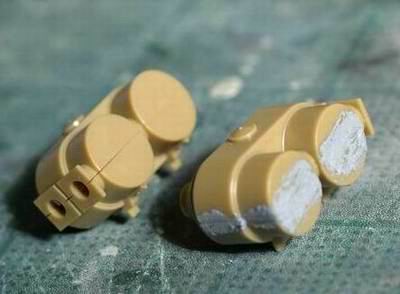 |
このエアフィルタの接着面は思いっきり目立つので、必ず消しておく。接着後、パテをすり込み。 This is the most visible mold line on the kit. It absolutely has to be erased. Use putty after gluing the parts. |
 |
2−3時間待ち、完全に硬化後。やすりがけを行う。曲面の処理には、マイクロマーク製、FLEX-I-FILEが便利である。 Wait at least 2-3 hours for the putty to completely dry out. I use Micro-Mark's FLEX-I-FILE for cleaning on a curved surface. |
 |
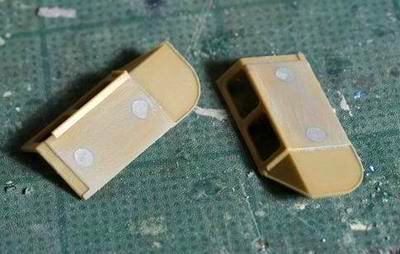
処理後 Beautiful, isn't it! |
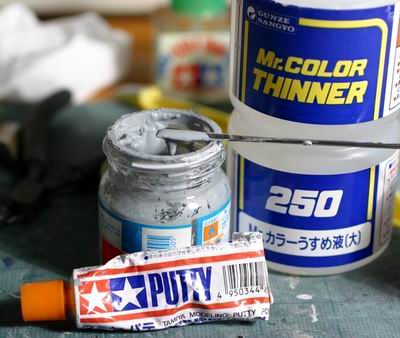 |
さて、私はキングタイガーなど多くの実物を見て、触ったこともあるが、資料本を見てわかるように、戦車の表面は鋳造の跡がはっきりわかるくらい、ざらざら、ぶつぶつの状態である。 これを再現するには、タミヤのパテをクレオスのラッカーシンナーで溶かし、ゆるいペースト状にする。 I have seen and touched a real King Tiger, the surface of the tank is very rough as it is cast. I express this with thinned putty. Mix Tamiya's regular putty with Gunze's Mr. Color thinner so that it becomes a paste. |
 |
そしてタミヤの攪拌棒の平面部分で薄く塗りつける。 パテはすぐ硬くなってしまうので、一度に行う範囲は写真の側面の半分程度にする。 Apply it with Tamiya's Paint Stirrer. As it get hard so quickly, I apply it a small area at a time, about half the area shown in the photo. |
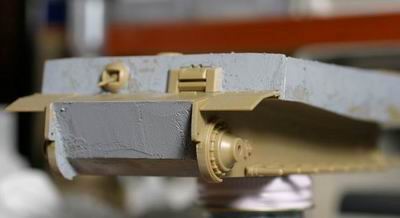 |
表面処理する部分は写真の部分。鉄板部分と、最初からモールドされている部分は行なわない。 Put putty on the part shown in this photo. Do not apply putty on the steel part. |
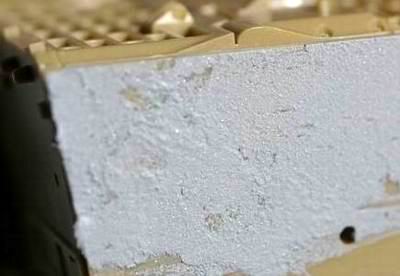 |
塗りつけた後の状態。まだ、でこぼこすぎる。 This is too much. |
 |
完全に硬化後、400番のやすりで軽く表面を均す。 After it has completely dried, sand slightly iwth with 400 grade sand paper. |
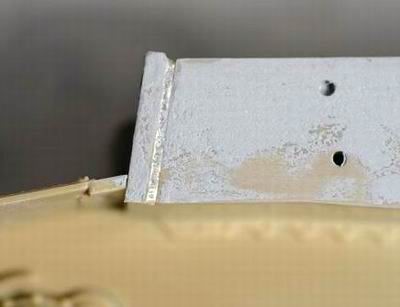 |
こんな感じ Like this... |
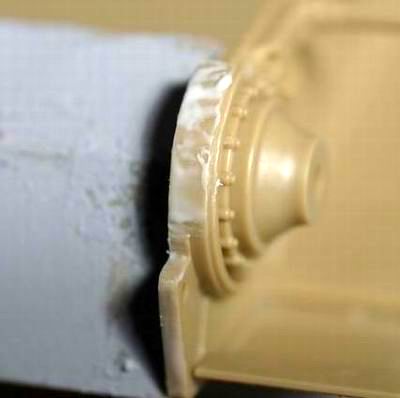 |
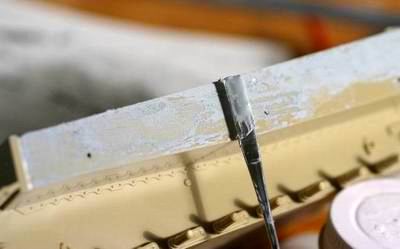
粗い削り跡をつける。クレオスのMr.溶きパテの出番。 Apply Creous's Mr. Dissolves Putty to simulate the rough cut. |
 |
少し硬くなってきたら、筋を入れる。 After the putty has slightly firmed, make the striped marks in it... |
 |
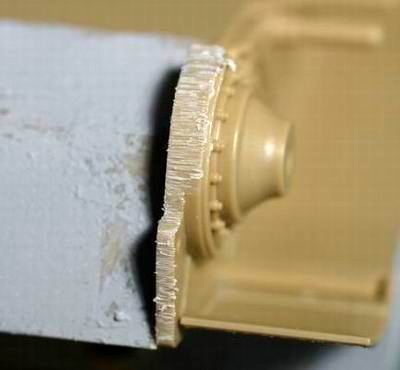
このように筋を入れる。 ...with the putty knife. |
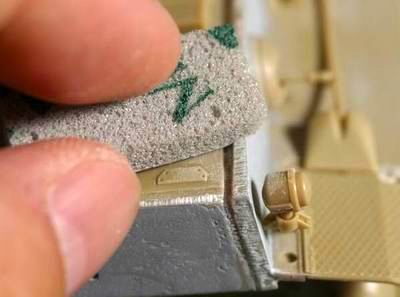 |
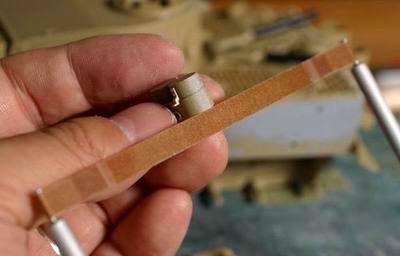
フィニッシュはスポンジやすりのミディアムで、対面やすりを使うと表面が揃いすぎてしまう。 For finish, I use a medium sanding sponge. It would be too flat with sanding paper or sanding sticks.。 |
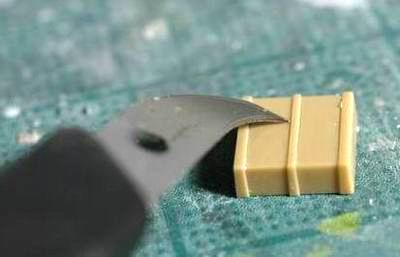 |
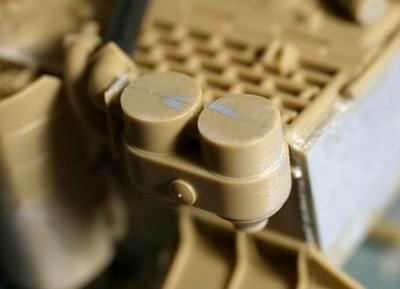
モールドにメリハリをつけるため、ハセガワの極細用ラインスクレーバーで境界に筋を入れる。 Scribe the gap between the box and the strap with Hasegawa's ultra-thin line scriber. |